- Forklift Lithium Battery
-
48V
- 48V 210Ah
- 48V 300Ah
- 48V 420Ah (949 x 349 x 569 mm)
- 48V 420Ah (950 x 421 x 450 mm)
- 48V 456Ah
- 48V 460Ah (830 x 630 x 590 mm)
- 48V 460Ah (950 x 421 x 450 mm)
- 48V 460Ah (800 x 630 x 600 mm)
- 48V 460Ah (820 x 660 x 470 mm)
- 48V 500Ah
- 48V 560Ah (810 x 630 x 600 mm)
- 48V 560Ah (950 x 592 x 450 mm)
- 48V 600Ah
- 48V 630Ah
-
48V
- Lithium Golf Cart Battery
- 12V Lithium Battery
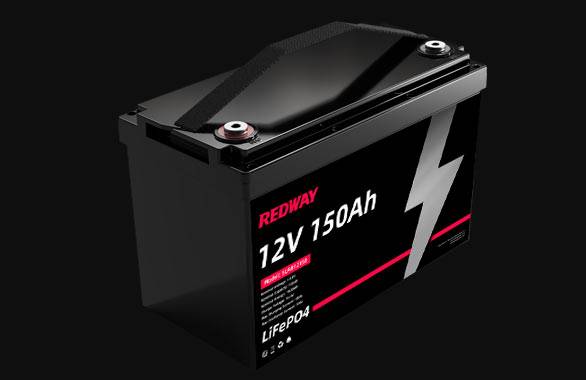
12V 150Ah Lithium RV Battery
Bluetooth App | BCI Group 31
LiFePO4 Lithium
Discharge Temperature -20°C ~ 65°C
Fast Charger 14.6V 50A
Solar MPPT Charging - 24V Lithium Battery
- 36V Lithium Battery
- 48V Lithium Battery
-
48V LiFePO4 Battery
- 48V 50Ah
- 48V 50Ah (for Golf Carts)
- 48V 60Ah (8D)
- 48V 100Ah (8D)
- 48V 100Ah
- 48V 100Ah (Discharge 100A for Golf Carts)
- 48V 100Ah (Discharge 150A for Golf Carts)
- 48V 100Ah (Discharge 200A for Golf Carts)
- 48V 150Ah (for Golf Carts)
- 48V 160Ah (Discharge 100A for Golf Carts)
- 48V 160Ah (Discharge 160A for Golf Carts)
-
48V LiFePO4 Battery
- 60V Lithium Battery
-
60V LiFePO4 Battery
- 60V 20Ah
- 60V 30Ah
- 60V 50Ah
- 60V 50Ah (Small Size / Side Terminal)
- 60V 100Ah (for Electric Motocycle, Electric Scooter, LSV, AGV)
- 60V 100Ah (for Forklift, AGV, Electric Scooter, Sweeper)
- 60V 150Ah (E-Motocycle / E-Scooter / E-Tricycle / Tour LSV)
- 60V 200Ah (for Forklift, AGV, Electric Scooter, Sweeper)
-
60V LiFePO4 Battery
- 72V~96V Lithium Battery
- Rack-mounted Lithium Battery
- E-Bike Battery
- All-in-One Home-ESS
- Wall-mount Battery ESS
-
Home-ESS Lithium Battery PowerWall
- 24V 100Ah 2.4kWh PW24100-S PowerWall
- 48V 50Ah 2.4kWh PW4850-S PowerWall
- 48V 50Ah 2.56kWh PW5150-S PowerWall
- 48V 100Ah 5.12kWh PW51100-F PowerWall (IP65)
- 48V 100Ah 5.12kWh PW51100-S PowerWall
- 48V 100Ah 5.12kWh PW51100-H PowerWall
- 48V 200Ah 10kWh PW51200-H PowerWall
- 48V 300Ah 15kWh PW51300-H PowerWall
PowerWall 51.2V 100Ah LiFePO4 Lithium Battery
Highly popular in Asia and Eastern Europe.
CE Certification | Home-ESS -
Home-ESS Lithium Battery PowerWall
- Portable Power Stations
What to Do If the Voltage Reading of Your Golf Cart Battery Falls Below the Recommended Range
A golf cart battery that shows a voltage reading below the recommended range can significantly impact your cart’s performance and reliability. If you find yourself dealing with this issue, it’s crucial to follow a systematic approach to diagnose and resolve the problem effectively. Here, we provide a detailed guide to help you address voltage issues and ensure optimal performance from your golf cart battery.
1. Inspect the Battery Connections
Battery connections are fundamental to the effective operation of your golf cart. If the voltage reading is below the recommended range, the first step is to examine the battery connections.
Check for Corrosion
Corrosion at the battery terminals can cause poor electrical conductivity, leading to a drop in voltage. Corrosion typically appears as a white, ashy substance around the terminals. To clean corroded terminals:
- Disconnect the battery: Always disconnect the negative terminal first to avoid electrical shorts.
- Clean the terminals: Use a mixture of baking soda and water to scrub the terminals. Ensure that the terminals and clamps are free of corrosion before reattaching.
- Reconnect the battery: Attach the terminals securely, starting with the positive terminal followed by the negative terminal.
Ensure Proper Tightness
Loose connections can also result in low voltage readings. After cleaning, make sure that all connections are tightly secured. Use a wrench to tighten the battery terminals, but be cautious not to overtighten, which could damage the terminals.
2. Charge the Battery Properly
If your connections are clean and secure but the voltage is still below the recommended range, the next step is to charge the battery. Follow these steps for effective charging:
Choose the Right Charger
Use a charger specifically designed for your golf cart battery type (e.g., lead-acid, AGM, or lithium). Using an incompatible charger can damage the battery or fail to provide the necessary charge.
Follow Charging Instructions
Refer to the manufacturer’s instructions for proper charging procedures. Generally, you should:
- Connect the charger: Attach the charger’s positive lead to the battery’s positive terminal and the negative lead to the negative terminal.
- Set the charging rate: Ensure the charger is set to the correct charge rate for your battery.
- Monitor the charging process: Follow the manufacturer’s guidelines on how long to charge the battery and check periodically for any issues.
Verify Charging Completion
Once the charging cycle is complete, measure the battery voltage again. A fully charged golf cart battery should show a voltage within the recommended range. If the voltage is still low, the battery may need replacement.
3. Assess Battery Health
If the voltage reading remains below the recommended range even after charging, it’s crucial to assess the overall health of the battery.
Perform a Load Test
A load test evaluates the battery’s ability to maintain voltage under load. This test can be performed using a battery load tester:
- Connect the tester: Attach the tester’s leads to the battery terminals.
- Apply the load: Follow the tester’s instructions to apply a load equivalent to half the battery’s Cold Cranking Amps (CCA) rating.
- Read the results: Check the voltage reading under load. A healthy battery should maintain a voltage above the recommended threshold. If it drops significantly, the battery may be failing.
Check for Internal Damage
Internal damage or defects can also cause voltage issues. Look for:
- Swelling or leaks: These signs indicate internal problems and often mean the battery needs replacing.
- Strange odors: A foul smell could indicate battery damage or leaking.
4. Replace the Battery
If all previous steps fail to resolve the voltage issue, replacing the battery may be necessary.
Select the Right Replacement
When choosing a new battery, ensure it matches the specifications of the original one:
- Voltage: Ensure the new battery has the same voltage as the old one.
- Size and Fit: Verify that the battery fits properly in the golf cart’s battery compartment.
- Type: Use the same type of battery (e.g., lead-acid, AGM, lithium) to avoid compatibility issues.
Install the New Battery
Follow these steps for proper installation:
- Position the battery: Place the new battery into the compartment.
- Connect the terminals: Attach the positive terminal first, followed by the negative terminal. Ensure all connections are tight and secure.
- Test the voltage: After installation, measure the battery voltage to ensure it is within the recommended range.
5. Implement Regular Maintenance
To prevent future voltage issues, adhere to a regular maintenance routine. This includes:
Regular Charging
Maintain a consistent charging schedule to keep the battery at optimal voltage levels. Avoid overcharging or undercharging, as both can affect battery life.
Routine Inspections
Periodically check the battery connections and clean them as needed. Inspect the battery for any signs of wear or damage.
Proper Storage
If you store your golf cart for an extended period, ensure the battery is charged and stored in a cool, dry place. This helps maintain battery health and performance.
Conclusion
Addressing a golf cart battery with a voltage reading below the recommended range involves a methodical approach. By inspecting the battery connections, properly charging the battery, assessing its health, and replacing it if necessary, you can ensure that your golf cart remains reliable and performs optimally. Regular maintenance and good charging practices further contribute to extending battery life and preventing future issues.
By following these detailed steps, you can resolve voltage issues effectively and maintain the performance of your golf cart.


