- Forklift Lithium Battery
-
48V
- 48V 210Ah
- 48V 300Ah
- 48V 420Ah (949 x 349 x 569 mm)
- 48V 420Ah (950 x 421 x 450 mm)
- 48V 456Ah
- 48V 460Ah (830 x 630 x 590 mm)
- 48V 460Ah (950 x 421 x 450 mm)
- 48V 460Ah (800 x 630 x 600 mm)
- 48V 460Ah (820 x 660 x 470 mm)
- 48V 500Ah
- 48V 560Ah (810 x 630 x 600 mm)
- 48V 560Ah (950 x 592 x 450 mm)
- 48V 600Ah
- 48V 630Ah
-
48V
- Lithium Golf Cart Battery
- 12V Lithium Battery
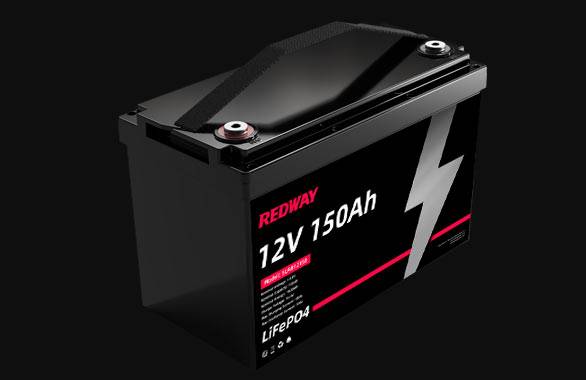
12V 150Ah Lithium RV Battery
Bluetooth App | BCI Group 31
LiFePO4 Lithium
Discharge Temperature -20°C ~ 65°C
Fast Charger 14.6V 50A
Solar MPPT Charging - 24V Lithium Battery
- 36V Lithium Battery
- 48V Lithium Battery
-
48V LiFePO4 Battery
- 48V 50Ah
- 48V 50Ah (for Golf Carts)
- 48V 60Ah (8D)
- 48V 100Ah (8D)
- 48V 100Ah
- 48V 100Ah (Discharge 100A for Golf Carts)
- 48V 100Ah (Discharge 150A for Golf Carts)
- 48V 100Ah (Discharge 200A for Golf Carts)
- 48V 150Ah (for Golf Carts)
- 48V 160Ah (Discharge 100A for Golf Carts)
- 48V 160Ah (Discharge 160A for Golf Carts)
-
48V LiFePO4 Battery
- 60V Lithium Battery
-
60V LiFePO4 Battery
- 60V 20Ah
- 60V 30Ah
- 60V 50Ah
- 60V 50Ah (Small Size / Side Terminal)
- 60V 100Ah (for Electric Motocycle, Electric Scooter, LSV, AGV)
- 60V 100Ah (for Forklift, AGV, Electric Scooter, Sweeper)
- 60V 150Ah (E-Motocycle / E-Scooter / E-Tricycle / Tour LSV)
- 60V 200Ah (for Forklift, AGV, Electric Scooter, Sweeper)
-
60V LiFePO4 Battery
- 72V~96V Lithium Battery
- Rack-mounted Lithium Battery
- E-Bike Battery
- All-in-One Home-ESS
- Wall-mount Battery ESS
-
Home-ESS Lithium Battery PowerWall
- 24V 100Ah 2.4kWh PW24100-S PowerWall
- 48V 50Ah 2.4kWh PW4850-S PowerWall
- 48V 50Ah 2.56kWh PW5150-S PowerWall
- 48V 100Ah 5.12kWh PW51100-F PowerWall (IP65)
- 48V 100Ah 5.12kWh PW51100-S PowerWall
- 48V 100Ah 5.12kWh PW51100-H PowerWall
- 48V 200Ah 10kWh PW51200-H PowerWall
- 48V 300Ah 15kWh PW51300-H PowerWall
PowerWall 51.2V 100Ah LiFePO4 Lithium Battery
Highly popular in Asia and Eastern Europe.
CE Certification | Home-ESS -
Home-ESS Lithium Battery PowerWall
- Portable Power Stations
How to Remove Brackets Holding Golf Cart Batteries: A Comprehensive Guide
Golf carts are essential for various recreational activities and practical tasks, and maintaining their performance requires regular upkeep. One crucial maintenance task is the removal of brackets holding the golf cart batteries. This guide provides a step-by-step approach to safely and effectively remove these brackets, ensuring minimal risk to the batteries and their terminals.
Understanding Battery Brackets and Their Purpose
Battery brackets are designed to secure the batteries in place within the golf cart. They prevent movement during operation, which is crucial for maintaining battery connections and ensuring the longevity of both the batteries and the golf cart’s electrical system. The brackets are typically made of durable materials like metal and are fixed with nuts or bolts.
Step-by-Step Procedure to Remove Brackets Holding Golf Cart Batteries
1. Locate the Battery Brackets
The first step is to locate the brackets or straps that are securing the batteries. These brackets are often positioned around the battery compartment and are designed to hold the batteries firmly in place. In most golf carts, you will find these brackets either directly above or around the sides of the batteries. They may appear as metal straps or brackets that are fastened with nuts or bolts.
2. Prepare the Necessary Tools
Before you begin the removal process, gather the necessary tools. You will typically need a wrench or pliers to remove the nuts or bolts. Ensure that you have the correct size tools to fit the fasteners securely. Having a magnetic tray can be helpful for keeping track of the nuts and bolts as you remove them.
3. Safety Precautions
Safety is paramount when working with batteries. Disconnect the power to the golf cart before starting the removal process to avoid any electrical hazards. Wear appropriate personal protective equipment (PPE), such as gloves and safety glasses, to protect yourself from accidental spills or electrical shorts.
4. Remove the Nuts or Bolts
Once you have located the brackets, use the wrench or pliers to loosen and remove the nuts or bolts securing the brackets. Start by turning the fasteners counterclockwise. Apply steady pressure and avoid using excessive force, which could damage the bolts, nuts, or surrounding components. If the nuts or bolts are rusted or stuck, consider using a penetrating oil to ease their removal.
5. Lift the Brackets Away
With the nuts or bolts removed, carefully lift the brackets or straps away from the batteries. Be cautious during this step to avoid any contact with the battery terminals. Accidental contact with terminals can lead to sparks or electrical hazards. It is advisable to gently maneuver the brackets out of the compartment to prevent any accidental jostling of the batteries.
6. Inspect the Batteries and Brackets
After removing the brackets, inspect the batteries and the brackets for any signs of wear or damage. Check the battery terminals for corrosion or loose connections. Similarly, inspect the brackets for any signs of bending, rust, or damage that might require replacement.
7. Store or Replace the Brackets
If you plan to reattach the same brackets, store them in a clean, dry place to prevent rust or corrosion. If the brackets are damaged, you should replace them with new ones to ensure a secure fit. For replacements, it is recommended to use brackets that match the specifications of your golf cart model.
Tips for Handling Golf Cart Batteries
- Avoid Short Circuits: Ensure that no metal objects come into contact with the battery terminals to prevent short circuits.
- Proper Disposal: If the batteries are to be replaced, dispose of the old batteries following local regulations for battery disposal.
- Regular Maintenance: Regularly check and maintain the battery connections and brackets to ensure optimal performance and longevity of your golf cart.
Choosing the Right Replacement Brackets
When selecting replacement brackets, it is important to choose ones that are compatible with your specific golf cart model. Consider consulting with a professional or referring to your golf cart’s manual for the correct specifications. High-quality brackets are essential for ensuring the secure positioning of your batteries and preventing potential issues during operation.
Expert Solutions from Redway Power
For those seeking high-quality golf cart batteries and custom battery solutions, Redway Power offers specialized services. As a leading LiFePO4 battery factory wholesaler, Redway Power provides exceptional battery solutions tailored to the needs of B2B and OEM clients worldwide. With extensive experience in manufacturing 48V golf cart batteries, Redway Power ensures quick and efficient service for all your battery needs.
To learn more about Redway Power’s offerings or to request a quick quote, please contact them directly for comprehensive and customized solutions.
Conclusion
Removing the brackets holding golf cart batteries is a straightforward process when approached with the right knowledge and tools. By following the steps outlined in this guide, you can ensure the safe and efficient removal of the brackets, thereby maintaining the performance and safety of your golf cart. Regular inspection and maintenance of the battery brackets and terminals will contribute to the longevity and reliability of your golf cart.
For further assistance or expert advice, do not hesitate to reach out to professionals or consult with specialized battery manufacturers.


