- Forklift Lithium Battery
-
48V
- 48V 210Ah
- 48V 300Ah
- 48V 420Ah (949 x 349 x 569 mm)
- 48V 420Ah (950 x 421 x 450 mm)
- 48V 456Ah
- 48V 460Ah (830 x 630 x 590 mm)
- 48V 460Ah (950 x 421 x 450 mm)
- 48V 460Ah (800 x 630 x 600 mm)
- 48V 460Ah (820 x 660 x 470 mm)
- 48V 500Ah
- 48V 560Ah (810 x 630 x 600 mm)
- 48V 560Ah (950 x 592 x 450 mm)
- 48V 600Ah
- 48V 630Ah
-
48V
- Lithium Golf Cart Battery
- 12V Lithium Battery
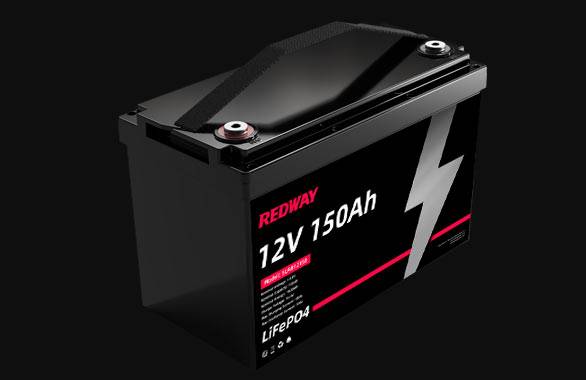
12V 150Ah Lithium RV Battery
Bluetooth App | BCI Group 31
LiFePO4 Lithium
Discharge Temperature -20°C ~ 65°C
Fast Charger 14.6V 50A
Solar MPPT Charging - 24V Lithium Battery
- 36V Lithium Battery
- 48V Lithium Battery
-
48V LiFePO4 Battery
- 48V 50Ah
- 48V 50Ah (for Golf Carts)
- 48V 60Ah (8D)
- 48V 100Ah (8D)
- 48V 100Ah
- 48V 100Ah (Discharge 100A for Golf Carts)
- 48V 100Ah (Discharge 150A for Golf Carts)
- 48V 100Ah (Discharge 200A for Golf Carts)
- 48V 150Ah (for Golf Carts)
- 48V 160Ah (Discharge 100A for Golf Carts)
- 48V 160Ah (Discharge 160A for Golf Carts)
-
48V LiFePO4 Battery
- 60V Lithium Battery
-
60V LiFePO4 Battery
- 60V 20Ah
- 60V 30Ah
- 60V 50Ah
- 60V 50Ah (Small Size / Side Terminal)
- 60V 100Ah (for Electric Motocycle, Electric Scooter, LSV, AGV)
- 60V 100Ah (for Forklift, AGV, Electric Scooter, Sweeper)
- 60V 150Ah (E-Motocycle / E-Scooter / E-Tricycle / Tour LSV)
- 60V 200Ah (for Forklift, AGV, Electric Scooter, Sweeper)
-
60V LiFePO4 Battery
- 72V~96V Lithium Battery
- Rack-mounted Lithium Battery
- E-Bike Battery
- All-in-One Home-ESS
- Wall-mount Battery ESS
-
Home-ESS Lithium Battery PowerWall
- 24V 100Ah 2.4kWh PW24100-S PowerWall
- 48V 50Ah 2.4kWh PW4850-S PowerWall
- 48V 50Ah 2.56kWh PW5150-S PowerWall
- 48V 100Ah 5.12kWh PW51100-F PowerWall (IP65)
- 48V 100Ah 5.12kWh PW51100-S PowerWall
- 48V 100Ah 5.12kWh PW51100-H PowerWall
- 48V 200Ah 10kWh PW51200-H PowerWall
- 48V 300Ah 15kWh PW51300-H PowerWall
PowerWall 51.2V 100Ah LiFePO4 Lithium Battery
Highly popular in Asia and Eastern Europe.
CE Certification | Home-ESS -
Home-ESS Lithium Battery PowerWall
- Portable Power Stations
How to Drive and Operate a Golf Cart Safely

Driving and operating a golf cart can be an enjoyable experience, whether on the course or in residential communities. However, it is essential to understand safety practices, maintenance requirements, and operational guidelines to ensure a safe ride. This comprehensive guide covers everything you need to know about effectively driving and operating a golf cart.
What are essential safety tips for driving a golf cart?
Essential safety tips for driving a golf cart include wearing seatbelts, obeying speed limits, and staying on designated paths. Always keep hands and feet inside the vehicle, avoid sudden turns, and yield to pedestrians. Additionally, never drive under the influence and ensure the cart is in good working condition before use.
Safety is paramount when operating a golf cart. Here are some critical tips to keep in mind:
- Always Wear Seatbelts: If available, ensure all passengers wear seatbelts.
- Observe Speed Limits: Most courses have speed limits ranging from 10 to 15 mph.
- Stay on Designated Paths: Only drive on paths marked for golf carts.
- Be Mindful of Pedestrians: Yield the right of way and watch for other players and staff.
- Avoid Sharp Turns: Make turns slowly to prevent tipping over.
Chart: Key Safety Tips Overview
| Safety Tip | Description |
|---|---|
| Seatbelts | Essential for passenger safety |
| Speed Limits | Maintain control and safety |
| Designated Paths | Protects turf and ensures safety |
| Pedestrian Awareness | Prevents accidents with other course users |
| Turning Caution | Reduces risk of rollover |
How can you prepare for driving a golf cart?
To prepare for driving a golf cart, familiarize yourself with the controls and operation of the vehicle. Ensure it is well-maintained by checking the battery, brakes, and tire pressure. Review local laws regarding golf cart usage and make sure you have any necessary permits or licenses.
Preparation is key to ensuring safe operation. Here are steps to take before hitting the road:
- Familiarize Yourself with Controls: Know where the accelerator, brake, and steering wheel are located.
- Check the Vehicle: Inspect brakes, tires, lights, and other essential components before use.
- Understand Local Regulations: Be aware of any specific rules governing golf cart use in your area.
Chart: Pre-Driving Checklist
| Preparation Step | Action Required |
|---|---|
| Control Familiarization | Locate accelerator, brake, steering |
| Vehicle Inspection | Check brakes, tires, lights |
| Regulation Awareness | Review local rules for operation |
What should you know about golf cart maintenance?
Golf cart maintenance includes regular checks of the battery water levels, tire pressure, and brake functionality. Clean terminals to prevent corrosion and lubricate moving parts to ensure smooth operation. Establish a routine maintenance schedule to address issues early and prolong the life of your golf cart.
Key maintenance tasks include:
- Routine Inspections: Check brakes, tires, and steering regularly.
- Battery Care: Ensure batteries are charged correctly and check for corrosion.
- Tire Pressure: Maintain proper tire inflation for optimal performance.
Chart: Maintenance Tasks Overview
| Maintenance Task | Frequency |
|---|---|
| Routine Inspections | Before each use |
| Battery Checks | Monthly or as needed |
| Tire Pressure | Monthly |
Why is it important to follow golf cart rules?
Following golf cart rules is crucial for safety and maintaining order on the course or community. Adhering to guidelines helps prevent accidents, protects pedestrians, and ensures a pleasant experience for all users. Violating rules can lead to penalties or restrictions on golf cart usage.
How do you drive a golf cart responsibly?
To drive a golf cart responsibly, obey all traffic laws and speed limits, use turn signals or hand signals when turning, and yield to pedestrians. Always ensure passengers are seated properly before starting and avoid distractions like texting while driving.
Responsible driving involves more than just following rules; it also includes:
- Avoiding Distractions: Stay focused on driving; do not use your phone or engage in other distracting activities.
- Driving at Safe Speeds: Adjust your speed according to terrain and conditions.
- Using Signals When Turning: Indicate your intentions clearly to others around you.
What are common mistakes to avoid when driving?
Common mistakes include overloading the cart with passengers, failing to yield to pedestrians, driving too fast, and ignoring maintenance needs. Avoid making sudden turns or driving on rough terrain without caution. Always check surroundings before reversing or changing direction.
To ensure safety while driving a golf cart, avoid these common mistakes:
- Overloading the Cart: Exceeding passenger limits can compromise stability.
- Ignoring Weather Conditions: Adjust your driving style in rain or wind.
- Not Yielding to Pedestrians: Always give way to pedestrians on paths.
Chart: Common Mistakes Overview
| Mistake | Consequence |
|---|---|
| Overloading | Increased risk of tipping |
| Ignoring Weather | Loss of control in adverse conditions |
| Not Yielding | Potential accidents with pedestrians |
How do you handle different terrain while driving a golf cart?
When handling different terrain, reduce speed on uneven surfaces or steep slopes to maintain control. Avoid driving in extremely rough areas that could damage the cart. Use caution when navigating hills; descend slowly and apply brakes gradually to prevent loss of control.
When navigating various terrains, consider these tips:
- Drive Slowly on Hills: Use caution when going uphill or downhill.
- Avoid Rough Terrain: Steer clear of excessively bumpy or uneven surfaces.
- Use Caution in Wet Conditions: Reduce speed on slippery surfaces to maintain control.
Industrial News
The use of golf carts has expanded beyond traditional courses into residential areas, resorts, and even urban settings as communities embrace eco-friendly transportation options. Recent trends show an increase in electric models due to their lower environmental impact and operational costs compared to gas-powered carts. As regulations evolve, many areas are also implementing stricter safety standards for golf cart operation.
Redway Power Insights
“Understanding how to safely operate a golf cart is crucial not just for individual safety but also for the enjoyment of everyone around,” states an industry expert. “With proper training and adherence to best practices, we can ensure that these vehicles remain a fun and safe mode of transport.”
FAQs
How old do you have to be to drive a golf cart?
How to adjust a governor on a gas Club Car golf cart?

How to adjust the governor on a Club Car golf cart?
How to change a golf cart tire?
How to change batteries in Club Car golf cart?
How to charge a Club Car golf cart?
How to charge golf cart batteries?
How to check golf cart batteries?
How to fix loose steering on Club Car golf cart?
How to install a radio in a Club Car golf cart?
How to install lights on a Club Car golf cart?

How to install turn signals on a Club Car golf cart?
How to jump solenoid on Club Car gas golf cart?
How to make a Club Car golf cart faster?
Know more:
What should you do if your golf cart makes noise or jerky movements after adjusting the governor?
If your golf cart makes noise or jerky movements after adjusting the governor, stop using the cart and recheck the adjustment. Ensure the governor isn’t too tight or loose, and inspect for loose or damaged components. Consult a professional if the problem persists.
What are the risks associated with running a golf cart at high speeds?
Running a golf cart at high speeds increases risks of accidents, reduced braking efficiency, loss of control, tire wear, and potential damage to the motor and battery, all of which can lead to safety hazards.
What should you be cautious of when adjusting a golf cart governor?
When adjusting a golf cart governor, be cautious of over-tightening, which can strain the engine, increase speed beyond safe limits, and void warranties. Ensure adjustments are made gradually and within safe operating guidelines.
How does a golf cart governor work?
A golf cart governor regulates the engine’s speed by controlling the throttle or airflow. It limits the cart’s maximum speed, ensuring safe operation and preventing engine overexertion.
What should you do if you can’t find the governor spring on your golf cart?
If you can’t find the governor spring, consult your golf cart’s manual for guidance. If it’s still unclear, contact the manufacturer or seek professional help to locate and adjust the governor properly.
What are the dangers of removing a golf cart governor?
Removing a golf cart governor can lead to excessive speeds, increasing the risk of accidents, loss of control, and potential damage to the engine and drivetrain. It may also void warranties and violate local laws.
What is a golf cart governor?
A golf cart governor is a device that limits the maximum speed of the cart by controlling the throttle or engine output, ensuring safe operation and preventing engine strain.
Why do manufacturers install governors on golf carts?
Manufacturers install governors on golf carts to ensure safety by limiting maximum speed, protecting the engine from damage, and complying with regulations governing low-speed vehicles.
What are the cons of adjusting a golf cart governor?
Adjusting a golf cart governor can lead to safety risks, increased engine wear, voided warranties, and potential legal issues if the cart exceeds regulated speed limits.
How can you get help with golf cart issues?
For golf cart issues, consult your owner’s manual, contact the manufacturer, or seek help from a qualified technician or a local golf cart service center for professional diagnosis and repair.
Know more:
How can I adjust the speed of my Club Car electric golf cart?
To adjust the speed of your Club Car electric golf cart, locate the speed controller under the seat. You can increase speed by adjusting the throttle cable or changing the controller settings. Consult your owner’s manual for specific instructions and ensure any modifications comply with warranty guidelines to avoid damage.
What tools do I need to adjust my Club Car’s speed?
Adjusting your Club Car’s speed typically requires basic tools such as a ratchet, socket set, and possibly a screwdriver. Depending on your specific model, you may need additional tools like a torque wrench. Always refer to your owner’s manual for detailed instructions on the necessary tools for adjustments.
Can I increase the speed of my Club Car without voiding the warranty?
Modifying the speed of your Club Car can void the warranty, especially if it involves altering the motor or controller settings. To avoid warranty issues, consult your dealer before making changes or consider using approved accessories designed to enhance performance without affecting warranty coverage.
What are the risks of increasing my golf cart’s speed?
Increasing your golf cart’s speed can lead to several risks, including reduced stability and control, increased wear on components, and potential overheating of the motor. Additionally, higher speeds may decrease battery life and affect overall safety while driving. Always weigh the benefits against these potential drawbacks.
How can I determine if my speed adjustment is effective?
To determine if your speed adjustment is effective, take your golf cart for a test drive on a flat surface. Measure its top speed using a GPS or speedometer app. Compare this with your previous speed to assess improvement. Monitor battery performance and handling to ensure safe operation at increased speeds.


